Quickstart Guide
Generating a new GPG key
If you want to sign your git commits, you will need a GPG certificate. It is possible to sign commits using S/MIME certificates, but I won’t go into that in this post.
If you’re using Windows, install GPG4Win first.
-
Open Bash (PowerShell on Windows) and run the following command to guide you through the process of generating a GPG key pair:
gpg --full-generate-key -
Choose the kind of key as
RSA and RSAby typing1and hitting Enter. -
Choose the keysize of
4096which is required. -
Specify the validity duration. One year is typically adequate, however, I chose it not to expire anyways.
-
Enter your name and email address. Make sure you use the same email address as of your GitHub or GitLab account if you want to use them.
-
Choose a secure passphrase! It’s also good security practise to generate and store your passwords in a password manager like I do.
Adding the GPG key to your GitHub/GitLab Account
If you want your commits to show as “Verified”, you will have to give GitHub or GitLab your GPG public key. No need to worry though, it is pretty easy to do and they won’t have your secret private key.
-
List the GPG key IDs in the long format with this command:
gpg --list-secret-keys --keyid-format=long -
Copy the ID of the GPG key you want to use. It is a 16-character hexadecimal (0-9, A-F) ID, which comes after
rsa4096/. -
Export the public key with the command below after changing ”
<GPG Key ID>” with the previously copied ID.gpg --armor --export <GPG Key ID> -
Copy your public key from the output of the last command, starting with
-----BEGIN PGP PUBLIC KEY BLOCK-----and ending with-----END PGP PUBLIC KEY BLOCK-----. -
Follow the GitHub or GitLab docs for adding a GPG Key to your account:
GitHub Docs: Adding a GPG key
GitLab Docs: Add a GPG key to your account
Configuring Git to Sign Commits
-
First, tell Git with which GPG key it should sign your commits. Copy the GPG Key ID like in Section 1-2 of Adding the GPG key to your GitHub/GitLab Account. Then, run this command to configure GPG Key ID for Git after changing ”
<GPG Key ID>” with the previously copied ID.git config --global user.signingkey <GPG Key ID> -
Configure the GPG path for Git: For Windows: If your path of Gpg4win differs, adjust it.
git config --global --unset gpg.program
git config --global gpg.program 'C:\Program Files (x86)\GnuPG\bin\gpg.exe'
For Linux: Make sure to replace ”
/usr/bin/gpg” with the path which thewhichcommand returned.which gpg git config --global --unset gpg.program git config --global gpg.program '/usr/bin/gpg' -
You can configure Git to sign commits by default using this command. If you only want to sign commits in the current repo, you can remove the
--globalflag.git config --global commit.gpgsign trueAlternatively, you can manually enable signing a commit by always adding the
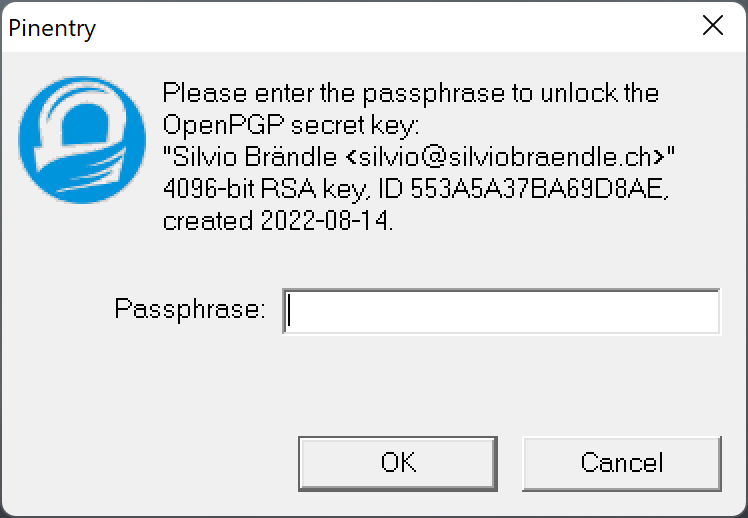
-Sflag to yourgit commitcommand:git commit -S -m "Hello World!"When creating a signed commit you might have to provide the passphrase you set earlier.
-
Check if it worked. After you created a new commit, you can run this command to display the signature of the last commit:
git log --show-signature -1If the commit was signed, you should see three lines starting with
gpg:. This example is a commit I made:commit cbb227e26bf98e1fc341b26531a722ef57ec340d (HEAD -> master, origin/master, origin/HEAD) gpg: Signature made Sun Aug 14 21:58:08 2022 CEST gpg: using RSA key 72F10F569126B3E32ABDC98C553A5A37BA69D8AE gpg: Good signature from "Silvio Brändle <silvio@silviobraendle.ch>" [ultimate] Author: Silvio Brändle <silvio@silviobraendle.ch> Date: Sun Aug 14 21:58:08 2022 +0200 Post: Querying WHOIS/RDAP servers
Signing Commits in Visual Studio Code (VSCode)
-
Open VSCode Settings.
CTRL+, -
Select “User” or “Workspace” settings. Choose “User” if you always want VSCode to sign your commits. If you only want to sign commits in the current workspace, you can choose “Workspace”.

-
Enable Commit Signing. You can find this setting under
Extensions > Git. When you now commit from VSCode, your commits will be signed by default.
Signing Commits in VSCode connected to Windows Subsystem for Linux (WSL)
When you’re connected to WSL from VSCode, you won’t be able to sign commits by default. You would be faced with the error: gpg failed to sign the data error, even if you have the GPG keys in WSL and configured Git like you would on normal Linux.
This is because the passphrase prompt won’t be shown on your Windows system through WSL, resulting in failing to sign the commit. Follow the steps for Configuring Commit Signing in WSL.
Configuring Commit Signing in Windows Subsystem for Linux (WSL)
-
Open a WSL bash. You can open PowerShell and type
wslto do that. -
Run this command to configure the
GPG_TTYenvironment variable:export GPG_TTY=$(tty) -
Configure Git to always sign commits:
git config --global commit.gpgsign true -
Configure the GPG program path for Git. First, find the path where gpg is installed.
which gpgThen, configure the path of GPG for Git. Replace
/usr/bin/gpgwith the path where gpg is installed from the previous command.git config --global --unset gpg.program git config --global --add gpg.program /usr/bin/gpg -
Create or edit the
gpg-agent.conffile using nano:nano ~/.gnupg/gpg-agent.conf -
Add this line to the file. If your path of Gpg4win differs, adjust it.
pinentry-program "/mnt/c/Program Files (x86)/Gpg4win/bin/pinentry-basic.exe" -
Finally, reload
gpg-connect-agentwith this command:gpg-connect-agent reloadagent /bye
After completing these steps, you should be able to commit in VSCode connected to WSL and you will see the passphrase entry popup. Note: You might have to update your graphics driver to get it working.